GIVE Tutorial 2.1: Easy local deployment of GIVE with GIVE-Docker
Table of Contents
Introduction to GIVE-Docker
The traditional way to deploy web service needs to install dependencies and configure environment at the operating system level. Although we already supplied a comprehensive tutorial for system-level custom installation of GIVE, it’s hard for users who lack experience in Linux administration to follow. Even expert users find it annoying.
Here, we provide a modern approach to deploy GIVE, GIVE-Docker. We built GIVE-Docker based on Docker container technology. It’s an operating-system-level virtualization technology that makes, build, ships and deploys standardized software and web service much easier as well as more elegantly without performance drop. Following this tutorial, you can set a completed genome browser on your computer in minutes. We recommend all users to use GIVE-Docker for deployment.
The GIVE-Docker image is published on DockerHub. It’s built on a LAMP on Ubuntu container. Scripts for building GIVE-Docker can be found in our GIVE-Docker GitHub Repo.
The GIVE-Docker image delivers an already configured GIVE with LAMP environment (Apache2, MySQL and PHP on Linux), data hub and GIVE-HUG, GIVE-Toolbox, a pre-built demo genome browser of Demo2-ENCODE2_ChIA-PET, and a set of example data for learning the usages of GIVE-Toolbox. Besides, the root account password of MySQL in GIVE-Docker is Admin2015.
How to use GIVE-Docker?
4-steps to deploy GIVE
-
Install Docker CE
If Docker was not installed on your computer, please download and install Docker CE. It’s very easy to install and supports all the mainstream operating systems and cloud computing services, such as Mac OS, Windows 10, Ubuntu, AWS and AZURE. After installation, you need to start the Docker service. For Windows and Mac OS users, just start the installed Docker software. For Linux users, you need to run the following command with root privileges.
service docker start -
Pull GIVE-Docker from Docker Hub
As we published GIVE-Docker on Docker Hub, it is easy to pull GIVE-Docker with a command.
docker pull zhonglab/give -
Run GIVE-Docker container
Execute the following command, then a GIVE container named as
givewill run in background. The-parguments set ports mapping to 80 (http) and 443 (https) ports of host server. The port number of Docker container is usually in range of 32768 ~ 61000. We use 40080 and 40443 in all the related tutorials, which can be changed if you want.docker run -d -it -p 40080:80 -p 40443:443 --name give zhonglab/give -
Test the built-in Demo2-ENCODE2_ChIA-PET genome browser
In the previous
docker runcommand,-poptions map three ports for communication between the operating system and GIVE container. With the mapping ports40080 -> 80(for http) and40443 -> 443(for https), you can use your web browser to open the built-in Demo2-ENCODE2_ChIA-PET genome browser with following URLs. It works like a standalone application on your computer. http://localhost:40080 (Recommended) https://localhost:40443 (You may see privacy errors from your browser when visiting localhost via https. Please refer to this page for potential solutions.)Tips: If you are using Docker Toolbox instead of Docker CE on an old Operating System or Windows 10 home edition, the
localhostneeds to be changed to “192.168.99.100”.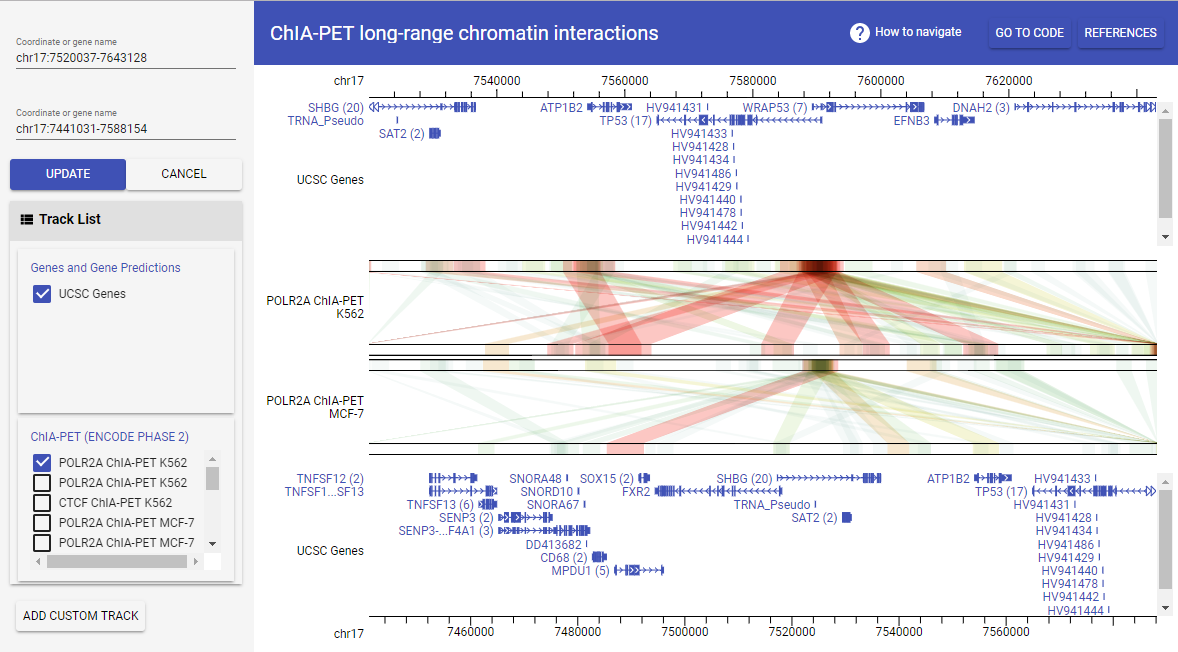
Configure The Host Server for Web Accessibility
After the 4 steps of deployment, you will get a local GIVE service. You can use it like a standalone application without internet access. If your host server is web accessible (can be accessed by other people through internet with HTTP/HTTPS), then you can configure the GIVE Docker container for using GIVE service remotely, like using our GIVE Data Hub.
In fact, you only need to set the give.Host variable to the domain name (with protocol and/or port if necessary) of your host server. We provide a shell script tool config_host.sh for configuring the host server. Just run the following command line in the give container. Learn how to login to the container using docker exec command in the essential tips section. To learn more about config_host.sh and other tools in GIVE-Toolbox, please read GIVE-Toolbox tutorial.
  docker exec -t -i give /bin/bash
  bash config_host.sh -r /var/www/give -d "http://give.genemo.org:40080"
The default value in GIVE-Docker is set as give.Host = 'http://localhost:40080'. You need to replace the default the value with your <host_url>, such as give.Host = 'http://give.genemo.org:40080'.
Note: You can consult the IT department of your organization for a subdomain, or buy a domain name from one of the domain name registrars (for example, NameCheap, enom or Go Daddy, you may also search for “domain name registrar” and pick the one you like). Once you have a domain/subdomain pointing to your server, you may use the URL as your host_url.
Although not recommended for security reasons, you may also use your server’s public IP address (together with the protocol and the port if needed) as the host_url value. An easy way of finding your public IP address would be to search “My IP” in Google from a browser launched on your server. If you cannot launch a browser from the server for any reason, you may get your IP from terminal/console instead:
hostname -I(Unix/Linux)
The IP will be the first string returned from this command.ipconfig(Windows)
The IP will be either after “IPv4 Address” or “IPv6 Address”.
If your IP is an IPv6 address (values like 01ab:23cd:45ef:6789:f0:0:1234:5678), please add square brackets [ and ] beside the IPv6 address before replacing give.Host. For example: give.Host = 'http://[01ab:23cd:45ef:6789:f0:0:1234:5678]:40080'
***
You may also directly edit the file /var/www/give/html/components/basic-func/constants.js in GIVE-Docker to update your give.Host value if you want.
Use GIVE-HUG in GIVE-Docker
You should know the GIVE-HUG in GIVE Data Hub, which makes customizing and sharing gneome browser much easier in single HTML file. The GIVE-HUG is also integrated in GIVE-Docker. You can use the URL “http://<domain name>:<port>/data-hub.html” to access the local data hub on your host server and utilize GIVE-HUG to generate customized genome browser in single HTML file. Please check the tutorial of GIVE Data Hub for more information.
Tips:
- If your host server is not web accessible, i.e., the
givecontainer is running in standalone mode, the HTML files generated by GIVE-HUG can only be locally used on your host server. It’s not shareable to others.- The
give.Hostenv variable in the file/var/www/give/html/components/basic-func/constants.jsis important to GIVE-HUG. It must be correctly set to ensure the generated HTML can work properly. You can use the shell script toolconfig_host.shin GIVE-Toolbox to configure it.- In standalone mode, the default value of
give.Hostis “http://localhost:40080”. You can access the data hub and use GIVE-HUG with URL “http://localhost:40080”. If other port number was used in yourgivecontainer, you need to change the value according to your settings.- In web service mode, i.e., you have correctly set the
give.Hostvalue to your<domain name>:<port>, you should always access data hub by<domain name>:<port>/data-hub.htmlto make sure the generated HTML is shareable.
Essential tips for adding data to GIVE container
After successfully deploying GIVE, you can utilize the power of GIVE to build your own genome browser. You can learn how to add your own data to your GIVE data source using GIVE-Toolbox in GIVE Tutorial 3. If you want to directly use MySQL commands (NOT recommended), you can read manual 3.2. MySQL commands for managing data in GIVE data source.
Here, we give you some essential tips on using GIVE container. You can read Docker official docs to learn more of Docker usage.
- Login to GIVE container
You can login to the running GIVE container give as root for further operations.
docker exec -t -i give /bin/bash
Alternatively, you can also directly login to the MySQL database of the container give.
docker exec -t -i give mysql -u root -p
The password of MySQL root account is Admin2015.
-
Transfer files
You can transfer files between GIVE container and operating system by using
docker cpcommand. The following commands are examples.# run GIVE-Docker container, named as give docker run -d -it -p 40080:80 -p 40443:443 -p 43306:3306 --name give zhonglab/give # copy file test.sh from OS to the container give docker cp ~/test.sh give:/tmp/test.sh # copy file from the container give to OS docker give:/tmp/test.sh ~/test.sh -
Stop, restart and remove running container
You can use
docker ps -ato check all the running and exited containers. You can stop, restart and remove them. Keep in mind that you will lose all the changes that have been made to the running container after you remove it.docker stop give docker restart give docker rm give -
Backup data of GIVE container
Keep in mind that all the custom changes made to container do not affect the Docker image, so when you remove a container you will lose all the data. If you want to save data in the container, such as MySQL data, there are at least three approaches to do it.
-
Use
docker commitanddocker saveto save the whole container, and usedocker loadto restore it.docker commit -p give give-custom docker save -o ~/give-custom.tar give-custom docker load -i ~/give-custom.tar -
Use Docker Volume
-voption to assign a host dir for saving data when you start the container. For example, in the following command, the dir/tmp/hostDirwill be mounted to the MySQL data dir in the GIVE-Docker container. All the changes you made to the MySQL databases in the container are saved in the host dir/tmp/hostDir.docker run -d -it -v /tmp/hostDir:/var/lib/mysql -p 40080:80 -p 40443:443 -p 43306:3306 --name give zhonglab/give -
Use Data Container. Check this tutorial to learn more.
-
Update to the latest GIVE
As we are continuously developing GIVE, the GIVE-Docker image will be rebuilt when we made important changes to GIVE. The latest version of GIVE-Docker image is released in the DockerHub with latest tags and the default pull is the latest version. Hence, if you want to update to the latest GIVE-Docker, you need to run pull command docker pull zhonglab/give again and re-run a new GIVE container. Keep in mind that those existing containers will not be affect by the updated image. So if you have already built a lot of data in existing GIVE container, you might not want to update GIVE-Docker because you don’t want to re-built all those data in a new container again. Here, we provide two approaches to update GIVE-Docker or GIVE.
**
*In fact, if you are using Docker Volume or Data Container, it’s much easier to share or transfer your data between different containers. It’s a good strategy for specific users very familiar with Docker.
***
-
Export and import MySQL database
As all the data are stored in MySQL, so you can use
mysqldumpto export all you data in an existing GIVE container, and then import it to a new container running from a updated GIVE-Docker image.Here is an example to show you how to do it.
- There is an existing container named as
old_giveand you have built a lot of data tracks in it. You need to log into it, export all those data usingmysqldump, and transfer the dumped.sqlfile to you home folder in host machine.# Log in to the container docker exec -t -i old_give /bin/bash # In the container's terminal, use mysqldump to export all the data mysqldump -u root -pAdmin2015 --all-databases > /tmp/old_give.sql # Exit to host terminal exit cd ~ # In host terminal, use docker cp to transfer data to docker cp old_give:/tmp/old_give.sql ~/ - In terminal of host machine, pull the latest GIVE-Docker, and run a new container
new_give. Transfer theold_give.sqltonew_givecontainer. As theold_givecontainer used-p 40080:80, so we use-p 50080:80to avoid port conflict.docker pull zhonglab/give docker run -d -it -p 50080:80 --name new_give zhonglab/give docker cp ~/old_give.sql new_give:/tmp - Log into the
new_givecontainer and import theold_give.sqlits MySQL database.# log in to the new container docker exec -t -i new_give /bin/bash # in the container's terminal, import sql file mysql -u root -pAdmin2015 < /tmp/old_give.sql
After the three steps, all the data built in the old container are migrated to the new container.
- There is an existing container named as
-
Update GIVE components in existing container
In fact, most of the time, the update of GIVE-Docker is only update of GIVE components including GIVE web components, back-end libraries, GIVE-Toolbox and so on. So we can just update those GIVE components in an existing container, which will save you a lot of time and energy.
We provide a bash script
update_give.shin GIVE-Toolbox. Here is an example of using it to update the GIVE components in an existing GIVE-Docker containergive.# log into the existing container docker exec -t -i give /bin/bash bash update_give.sh -r /var/www/give -b /usr/local/bin -t /tmp -g masterFor more usage information of
update_give.sh, you can check the Manual 3.1: GIVE-Toolbox Usage.